This is a lightweight digital repository for data based on the concepts of collections of filesets. Both the collection and the fileset are assigned a DOI by the DataCite organisation which can be quoted in articles.
There are two rather different approaches to such RDM:
To use command-line scripts based on Python, which can themselves be used to create alternative graphical user interfaces if desired.
Preparing the data
This section will contain notes about the kinds of data that can be deposited/published. If there is a rule of thumb, you should keep each individual datafile small and also consider how YOU might find access to that file useful in the future. This means do NOT convert the data to eg a PDF file (where the main purpose is printability and human readability but not reuse of the data). Examples of chemical data are welcomed here.
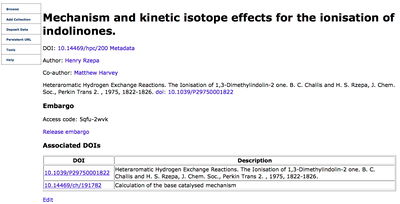
The deposition collection DOI:10.14469/hpc/200 (shortform DOI:bbnw ) contains one dataset (DOI:10.14469/hpc/202 ) and two further associated DOIs, one to a published article and one to a calculation held on another repository.
The dataset DOI:10.14469/hpc/202 (shortform DOI:bbnx ) contains three files; a ChemDraw file which was use by the system to automatically generate inChI identifiers for the system shown in the entry as metadata and two data files containing the input and outputs of the KINISOT program which is itself referenced with a DOI.
Please add your own examples here.
The Web-based deposition tool
This requires a standard web browser and hence can be used on desktop, laptop and tablet devices.
overview If you are staff, you will have an ORCID already assigned to you. You need to have its password handy. If you do not have an ORCID, go to http://orcid.org and sign up for one.
Next is a one-off operation to associate your ORCID with the data repository. Follow the prompts, and at the ORCID site, allow https://data.hpc.imperial.ac.uk/ to authenticate using these credentials.
If you are a research group director, you may wish to create one or more project collections.
Go to Add collection and add a title and brief description. These two properties will be used as meta-data and eventually sent to DataCite for use in their data search interfaces. If you have an existing collection (perhaps a superset of the group's work) add the new collection as a member. Click submit to register the collection.
Now go to browse in the lhs taskbar and click on the DOI of the just created collection.
This provides you with an access code that can be used by others to access the collection. The collection is embargoed (ie private) except to those who you send the access code.
You can also chose to invite other group members who have already completed the ORCID registration steps described above. To do this, click edit and in the Collaborators list, add whoever you wish to the collection.
You can also if you wish now also add associated DOIs. This might be previous publications arising from the project and can be added to at a later stage as desired.
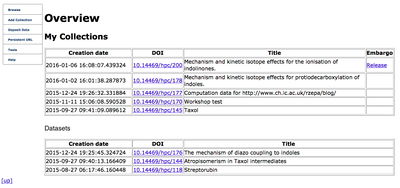
Back on the browse page you now have a summary of your entries. There should now be one collection, to which you (and others) can now start to populate with datasets.
collection If you are a research student, your group may now have collections already created by another member (supervisor). You can either follow the procedure to create a collection as above, or you can start to add data to an existing collection.
In the deposit data item in the lhs taskbar, add a title and description. Using choose files select the files from your local hard drive or Cloud storage (Box). You can select multiple files for upload, but all will inherit the same title and description. In the Member of dropdown, select either a collection you have previously created or one that your supervisor has invited you into.
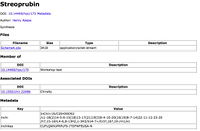
If one of the files in the set uploaded contains chemical connectivity information (e.g. a Chemdraw .cdx file), this will be used to generate metadata to be associated with the fileset. For this reason, you should ideally create a separate fileset for each distinctly different molecule.
Back in Browse you should see the recently uploaded fileset, with the DOI assigned to it.
Click on the DOI of any fileset and you should see the files listed and their descriptions.
If you click on edit you can add an associated DOI to this fileset (for example an article about to be published on the topic). This can be added at a later stage if it is not yet known.
To summarise, you now have a collection and its own DOI, and within that collection you have one or more filesets, with each fileset also having its own DOI. This is all embargoed until the original creator of the collection releases the embargo. At this stage, all the collected metadata is released and sent to DataCite, and shortly thereafter it becomes accessible using the standard http://doi.org/DOI invocation.
You can before the embargo is released cite both the collection DOI and the individual dataset DOIs in any articles that make use of the data.
A recent example illustrating some of the above aspects, with the embargo released: DOI:10.14469/hpc/200 .
The Web-based Mpublish procedure for NMR Spectra
The instructions in this section are available as a printable document (thanks Clare!)
Set yourself up with an ORCID identification (if you do not already have one) at http://orcid.org and leave yourself logged into to this page.
Sign into the Data Repository (https://data.hpc.imperial.ac.uk), first through your Imperial ID and then through ORCID. On the ORCID page, authorize the Imperial repository.
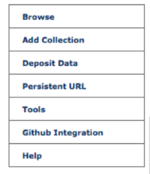
In the top left hand corner of the repository page you will see the following list of options:
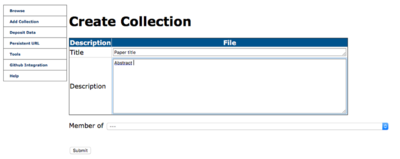
Each new set of data (i.e. all the data you want to upload for a publication project) is called a collection. To start a new dataset, click Add Collection.
Collections can be hierarchical. Thus a collection can be both a member of another collection and have its own members. The top level might eg be a group project, of which individuals can contribute their own collections, which in turn may have collections of say NMR, Computational, analytical etc data.
Name your collection and add a description (you must have something in the description category). Tip: paper title and abstract work well for the title and description, respectively. Click submit.
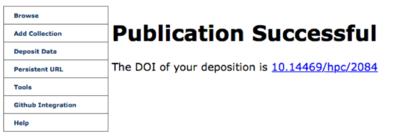
Once you have clicked submit, a DOI in generated for the collection. The DOI is private and is embargoed. Any external person wishing to view any data under this DOI will either need the access code or you will need to release the embargo.
To obtain the access code or to release the embargo, go to ‘Browse’ and select the collection.
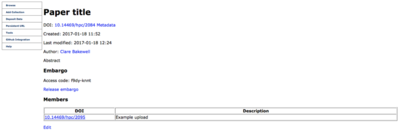
To add data to your collection click Deposit Data. Choose the file(s) you would like to upload, add a title and a description. Uploading each file individually is advised (click add file to choose another file another) and once the files are uploaded select the data to be a Member of the relevant collection. Click submit. A DOI for the data deposition is created.
If you now browse your collection, the data is listed; in this case as Example upload, clicking on the DOI allows access to the uploaded files associated with Example upload. It is useful to create new data depositions for each set of data you upload (for instance data type or experiment/compound names)..
Clicking on edit allows you to modify your collection. Here you can add any associated DOIs to your collection (such as relevant publications), and list both internal and external collaborators via their ORCID (you may have to ask them to provide this).
Once all of your files are uploaded you’re ready to go. Share the DOI with anyone you want to share the data with. Don’t forget to either provide them with the access code or release the embargo.
It is not possible to delete data once uploaded. However, if you make a mistake you can redirect your data to a different collection. We suggest making a reject collection, any unwanted uploads can be made a member of the reject collection, and to prevent it being seen by others do not release the embargo of this collection.
For NMR data specifically, you can prepare up to three individual files for upload.
A chemdraw file for the structure, saved as a .cdxml format
an Mnova file (prepared using Version 11 of the software or greater)
optionally a .zip archive created from the original spectrometer folder retrieved from the Bruker fileservers.
Deposit data and associate with a collection as described above. Upload the files individually i.e. the MestReNova file as file 1 and the Chemdraw file as file 2. Any other data associated with the compound may also be uploaded.
When you upload the MestReNova and Chemdraw files, a .mnpub file will automatically be generated for each .mnova file found and each .zip archive found. Metadata is generated from the ChemDraw file (InChI string and InChI key).
The .mnpub file is a simple text file containing the location of the Mnova file on the repository and a digital license key which will inform MestreNova (V 11+) to allow the full functionality of the program to be used with this file. Downloading and double clicking the .mnpub file will automatically check the license, download the spectral file, display it and allow it to be processed, even if an unlicensed version of MestreNova is used..
The .mnpub cannot be tested whilst an embargo is in place (it does not carry the access code and so the access will fail). To test the .mnpub the embargo must first be released. Alternatively if e.g. referees are sent the access code(s), they can directly download the mnova file, but of course they would have to have a MestreNova license to process it.
You might wonder that if anyone has full editable access to a spectral file using this procedure, might they not try to fraudulently pass it off as their own spectrum in their own publication? They would in fact be extremely unwise to try this, since the noise signature of any spectrum is absolutely unique and the original file is clearly identified by its DOI and most critically the associated date stamp found in the metadata. Any incorrectly attributed instances of the spectrum that might make an appearance subsequent to the date-stamped version which prove to have identical noise would clearly be identified, with resulting consequences.
Cross linking collections created by different depositors
The following is an example of a master collection DOI:10.14469/hpc/436 which is placed in edit mode by its creator.
The collaborators menu shows a list of depositors authorised for deposition, and three of these have been added as collaborators to this collection. In turn, this will now allow any of these collaborators to make their own collection a member of this (master) collection. When this is done, this master collection will now show as follows, with the arrow indicating a collection deposited by a co-author (Hossay Abas in this instance).
Live Views
It is possible to embed into the landing page of any published collection or dataset a live view of the data.
The data for this example is defined by the URL https://data.hpc.imperial.ac.uk/resolve/?doi=6756&file=4 which is obtained by going to the entry and copying that file link using the Browser. A similar process can be used to edit the index.html source of example 2, obtained at https://data.hpc.imperial.ac.uk/resolve/?doi=7720&file=7 In this example the data is obtained by quoting its DOI. The script then resolves this DOI to the actual path of the data.
The command line deposition tool
The command line python script should be downloaded and run on the user's computer.
First, create a collection. This could be used for depositing data associated with a specific project or sub-project:
publish.py --make-collection --title "Collection title" --description "Collection description" or
publish.py --make-collection --title "Collection title" --description=@filename for long descriptions contained in a pre-prepared file.
The script will ask for your college username and password, and then return a DOI for the collection unless you also pass these in as per:
publish.py --make-collection --title "Collection title" --description "Collection description" --username --password
To create a files associated with a collection:
publish.py --title "dataset title" --description "dataset description" or @filename --collection <collection DOI> or "existing collection title" --file filename1 "file 1 description" --file filename2 "flle 2 description"
Repeat the --file flag as many times as desired.
shortDOIs
The DOI returned by the scripts above can be shortened using http://shortdoi.org/
Search Queries
Examples of search queries that make use of the metadata collected during deposition are shown here.
This section is being updated. Meanwhile , for a cascading tutorial which illustrates how searches can be carried out, view this blog
Bug reporting and Suggestions for future enhancements